Signature request with the signNow API: How to create freeform and role-based invites

This blog will explore one of the essential features of the signNow API — sending signature requests, also referred to as signature invites. Also, you’ll get the basic knowledge to start building your own signNow API workflows.
Before we start, make sure to check out other blogs you may find useful:
There are two types of signature invites in signNow which require different payloads:
- A freeform invite allows recipients to add their signature anywhere on a document.
- A role-based invite is sent when your document already contains fields and has to be filled out and signed in a certain order and in accordance with pre-set parameters.
Let’s proceed to the step-by-step instructions on how to create freeform and role-based signature invites for uploaded documents using the signNow API.
1. How to create a freeform invite using the signNow API
Prior to creating a freeform invite, authorize and upload a document to your signNow account. Note that a document used for sending a freeform invite cannot contain fillable fields.
Now, open a new tab in Postman, switch to POST, and specify an endpoint. Then, set up the headers using your bearer token.
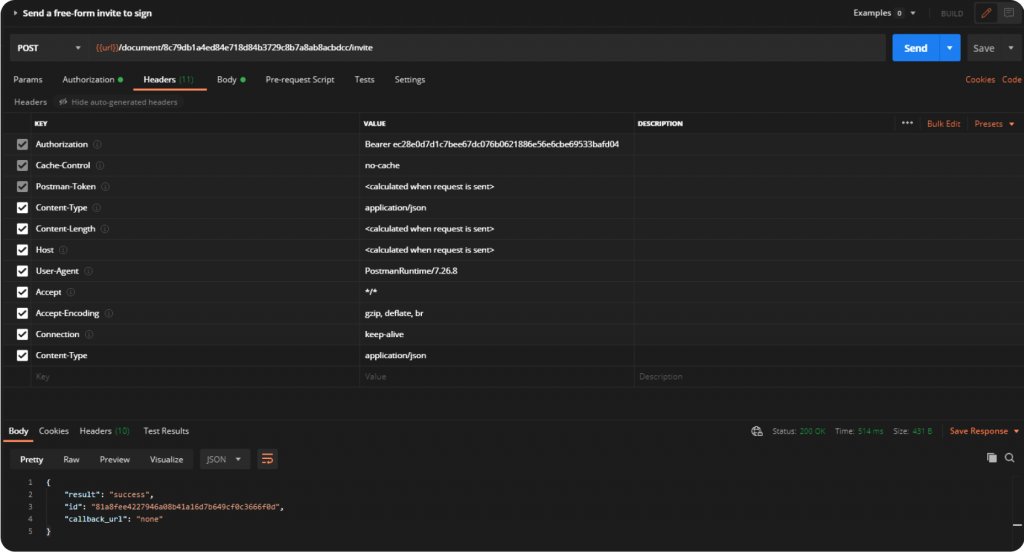
Switch to the body of the request and specify an email address for both the Sender and Signer. Note that you can only use your signNow login email when filling out the “from” section of the request.
|
1 2 3 4 5 6 7 8 9 10 11 12 |
curl --location --request POST \ 'https://api.signnow.com/document/{{document_id}}/invite' \ --header 'Content-Type: application/json' \ --header 'Authorization: Bearer {{access_token}}' \ --data-raw '{ "document_id": "{{document_id}}", "from": "sender@email.com", "to": "signer@email.com", "subject": "sender@email.com Needs Your Signature", "message": "sender@email.com invited you to sign the Invoice document", "on_complete": "document_and_attachments" }' |
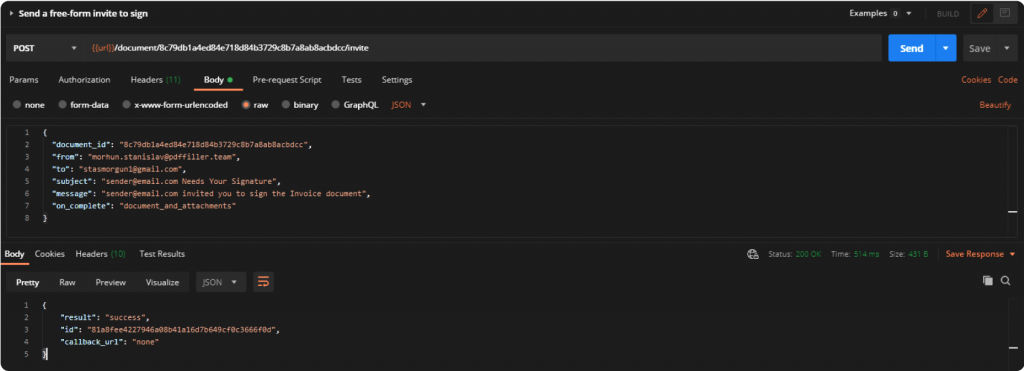
Once finished, send the request, go back to signNow, and reload the page. As you can see, your freeform invite was sent successfully!
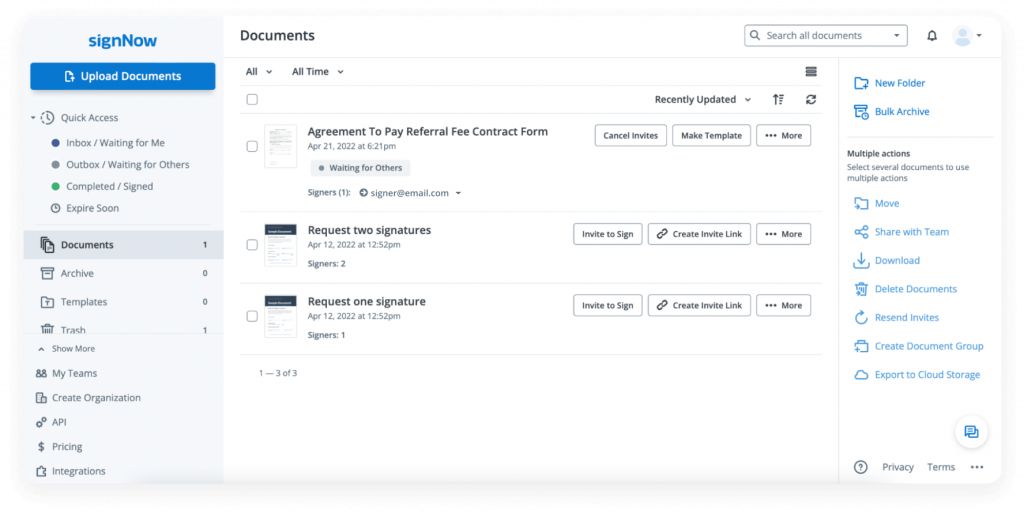
2. How to create a role-based invite using the signNow API
Now let’s try sending a role-based invite to multiple signers. Upload another document and add fillable fields to it.
Watch this video to learn how to upload a document using the signNow API:
Next, we’re going to invite two signers — let’s call them Employee and Manager — to review and sign our document. To do so, update the document ID in the endpoint, open the body of the request, and specify parameters for each signer.
Required parameters to create a role-based invite
First, let’s go through the required parameters.
|
1 2 3 4 5 6 7 8 9 10 11 12 13 14 15 16 17 18 19 20 21 22 23 24 25 26 27 28 29 30 31 32 33 34 35 36 37 38 39 40 41 42 43 44 45 46 47 48 49 |
curl --location --request POST \ 'https://api-eval.signnow.com/document/{{document_id}}/invite' \ --header 'Content-Type: application/json' \ --header 'Authorization: Bearer {{access_token}}' \ --data-raw '{ "document_id": "{{document_id}}", "to": [ { "email": "signer1@email.com", "role_id": "", "role": "Recipient 1", "order": 1, "prefill_signature_name": "Recipient", "force_new_signature": 1, "signing_instructions": "Please, add your signature here", "reassign": "0", "decline_by_signature": "0", "reminder": 0, "expiration_days": 30, "authentication_type": "password", "password": "123456", "subject": "You've got a new signature request", "message": "Hi, this is an invite to sign a document from sender@email.com." } ], "from": "sender@email.com", "cc": [ "sales@email.com" ], "cc_step": [ { "name": "CC 1", "email": "sales@email.com", "step": 1 } ], "viewers": [ { "email": "viewer@email.com", "role": "Viewer 1", "order": 1 } ], "subject": "sender@email.com Needs Your Signature", "message": "sender@email.com invited you to sign the Invoice document", "cc_subject": "cc Invoice request", "cc_message": "cc Invoice request for Signer 1", "on_complete": "document_and_attachments" }' |
Fill in the recipient’s email address. Then, set the role id parameter which is a unique identifier for the signer’s role. It accepts either an empty string or actual role id as a value.
Next thing we want to do is set the invite role and specify the order in which we want the Employee and Manager to open and sign our document.
The reassign parameter accepts one of two possible values: 0 and 1, and determines whether or not the recipient is allowed to pass the document for signature to somebody else. Accordingly, the declined by signature parameter, if equal to 1, adds the decline button next to the signature field.
Reminder and expiration days are two optional parameters you can add in case you want to send reminders to your signers or set an expiration date for your signature invite. You can also add an extra level of security by specifying the authentication type parameter. Finally, you can create a personalized message for each recipient using the subject and message parameters.
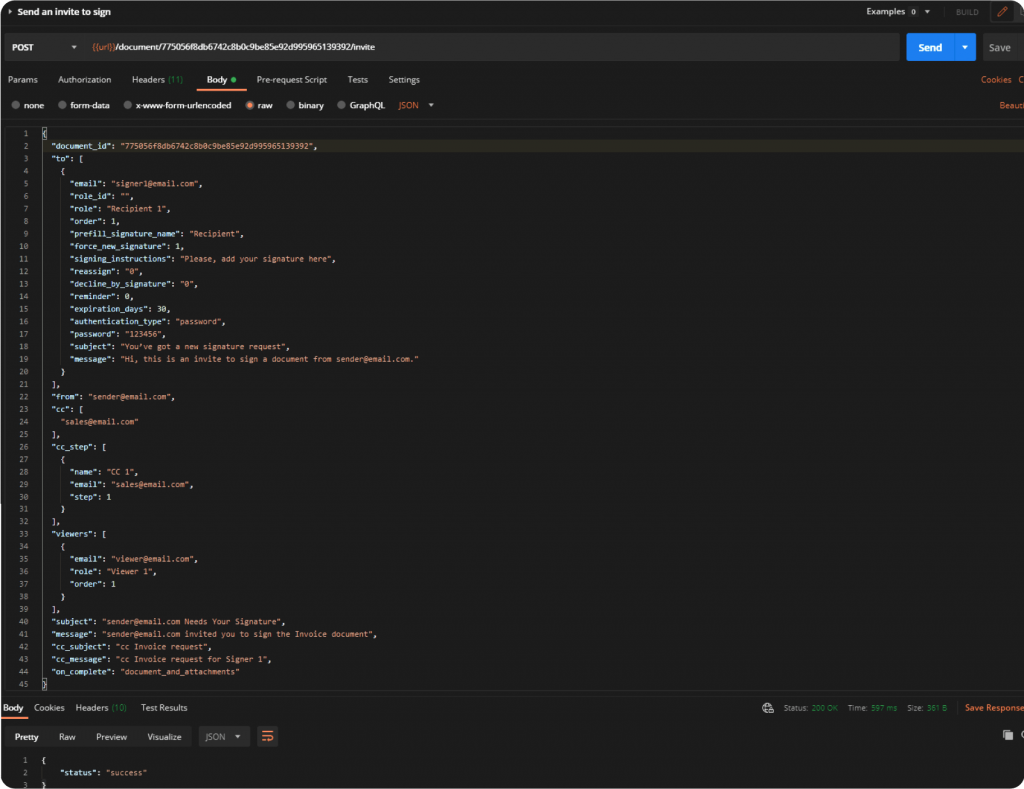
Once all the necessary parameters are set, simply hit Send.
Now let’s head back to the Developer Sandbox and make sure everything is in the right place. As you can see, our role-based invites have been successfully created!
Watch the video below to get step-by-step instructions on how to send two types of signature invites using the signNow API:
For more information on the signNow API, its features, and references, please view our detailed documentation.

