
The signing process consists of a lot of factors that impact the whole workflow cycle. So it’s important to figure out how traditional paperwork signing differs from paperless processes. We prepared a small guide on how to build a basic e-signature and ‘handwritten’ workflows from A to Z.
Typical steps of paper-based workflow
1.Make an appointment with a signer.
In case you need multiple signatures, arrange several meetings. Make sure you meet deadlines, taking under consideration that meetings are delayed all the time.
2.Get the paper form.
Enough words are said about going green and the feasibility of paperless workflow. Over one third of all harvested trees are used for paper and paperboard production. Using paper includes printing, scanning and delivery. Sounds a bit daring.
3.Fill it out.
Three cons: high probability of mistakes and prone to being damaged. Also, once a thing is written, it’s forever.
4.Sign it.
The future is clearly on the horizon. And the future promises that the wet signature will soon be an artifact. Fingerprint recognition, passwords, and PIN codes coexist with e-signature. And this has already been proven by the experience of many successful organizations.
If you can’t arrange a meeting with your partner to sign the contract face-to-face, take the following steps:
- Find an envelope
- Address and seal the envelope
- Get a stamp and affix it to the envelope
- Post it off
Now translate these steps into a temporary equivalent. It’s a little overwhelming to even consider…
And how do you actually know that the signature is authentic?
Typical steps of SignNow’s e-signature workflow
1.Uploading a document
In your account, click Upload Document on the top panel and browse for it on your computer. Or drag and drop it directly to your account page.

2.Arranging Fillable Fields
In the editor, you’ll have a sidebar with fillable fields for various purposes. The most frequently-used of them are text, date, checkboxes and signature fields. Select the field you need and click on the page where you want to put it.
You can change the size of the field by dragging its corners.
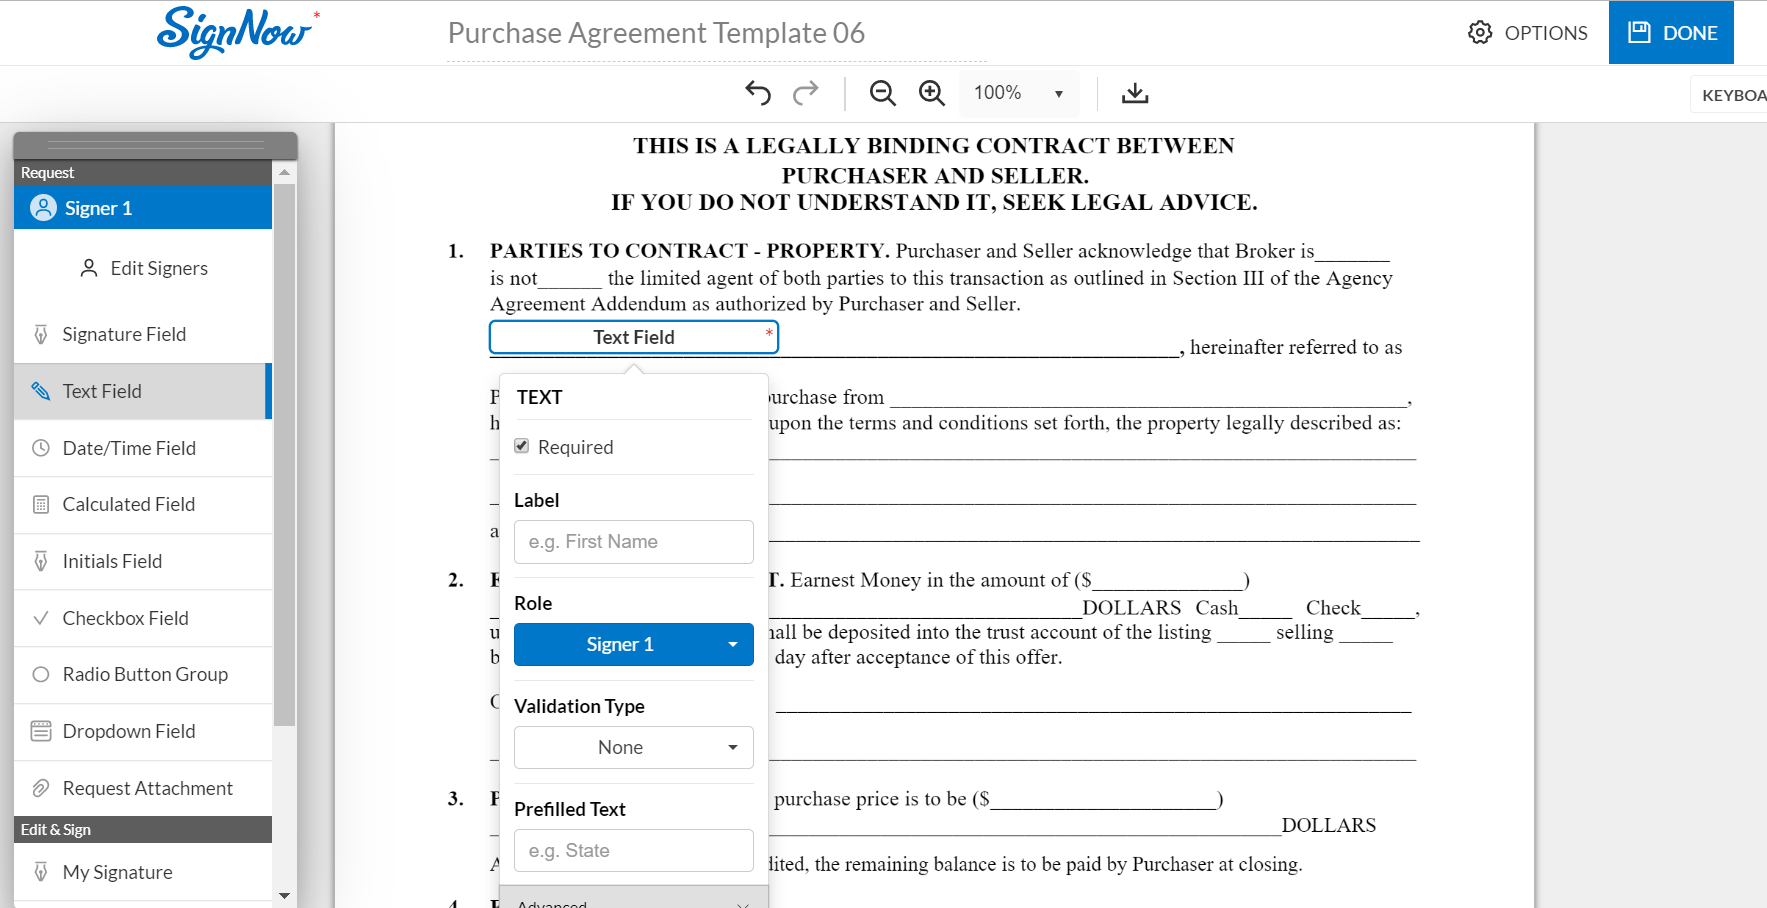
3.Setting Roles
If you have more than one signer, you can prepare separate fields for each of them. First, you have to put the needed number of fields and then assign roles for each. Click on the field and choose Add Role in the Role dropdown.
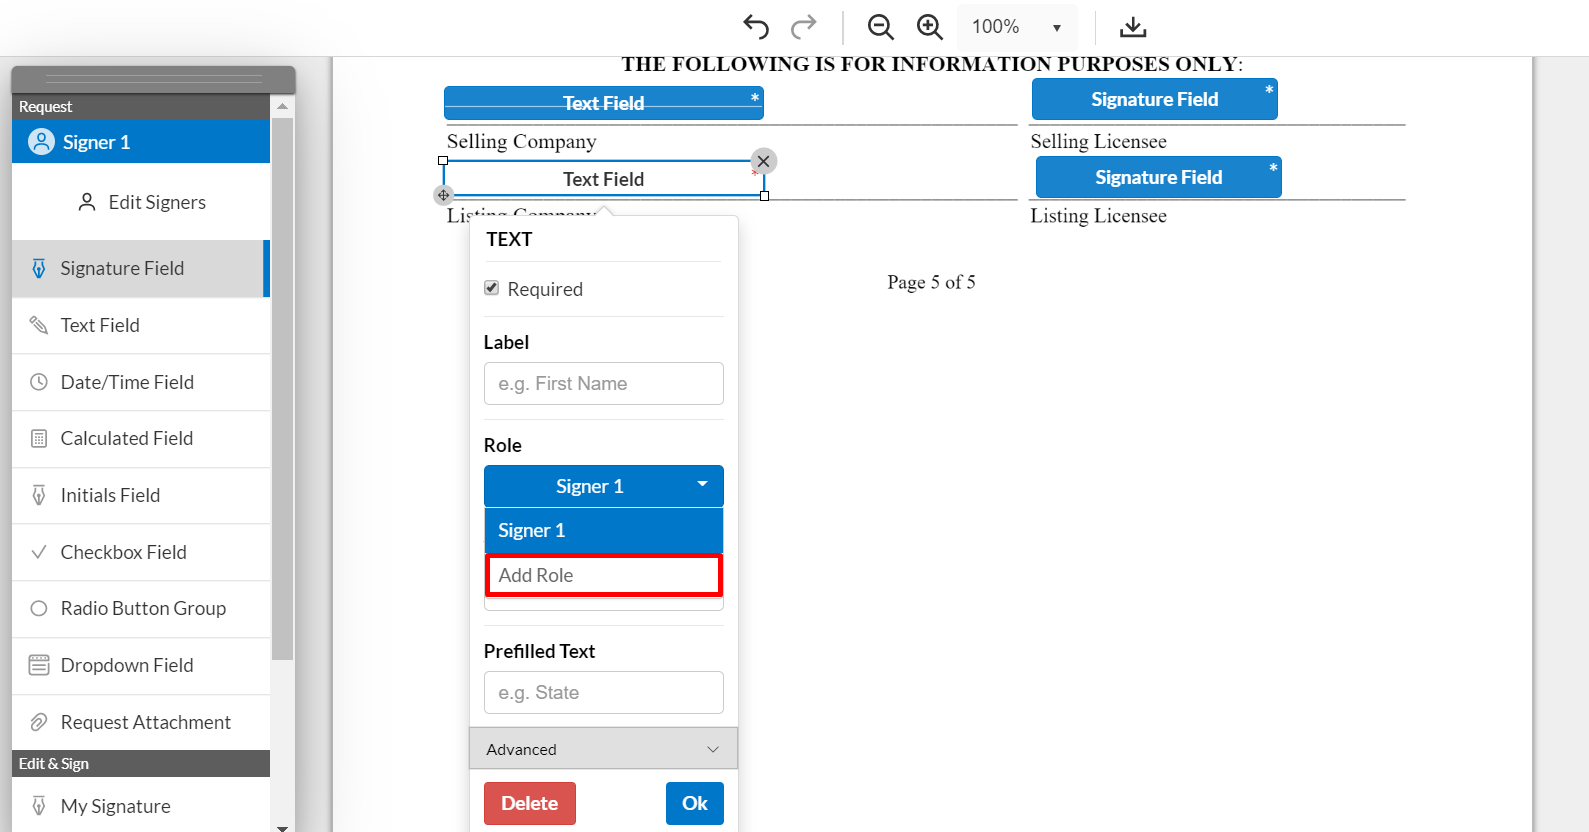
Fields for different signers will be of different colors. You’ll also have a list of signers on the sidebar.
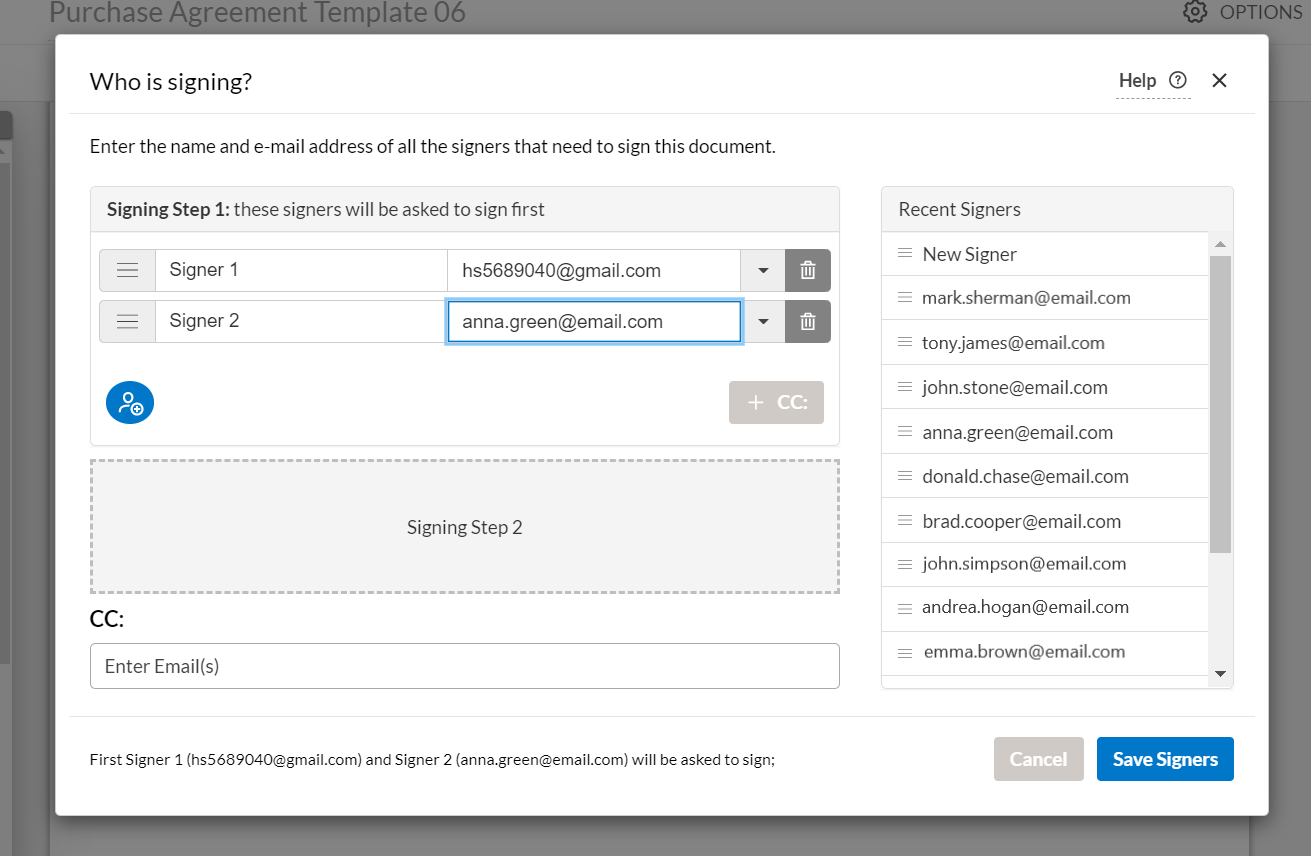
If you click Edit Signers, you’ll be able to: 1) bind emails to the signers 2) add new signers 3) delete signers.
4.Customizing Invite
To send out the document, click Invite to Sign.

Emails that you’ve saved in the previous step will be automatically filled out. If not, you’ll have to enter them in the invitation window. Also, you can indicate emails that will receive carbon copies of the document.
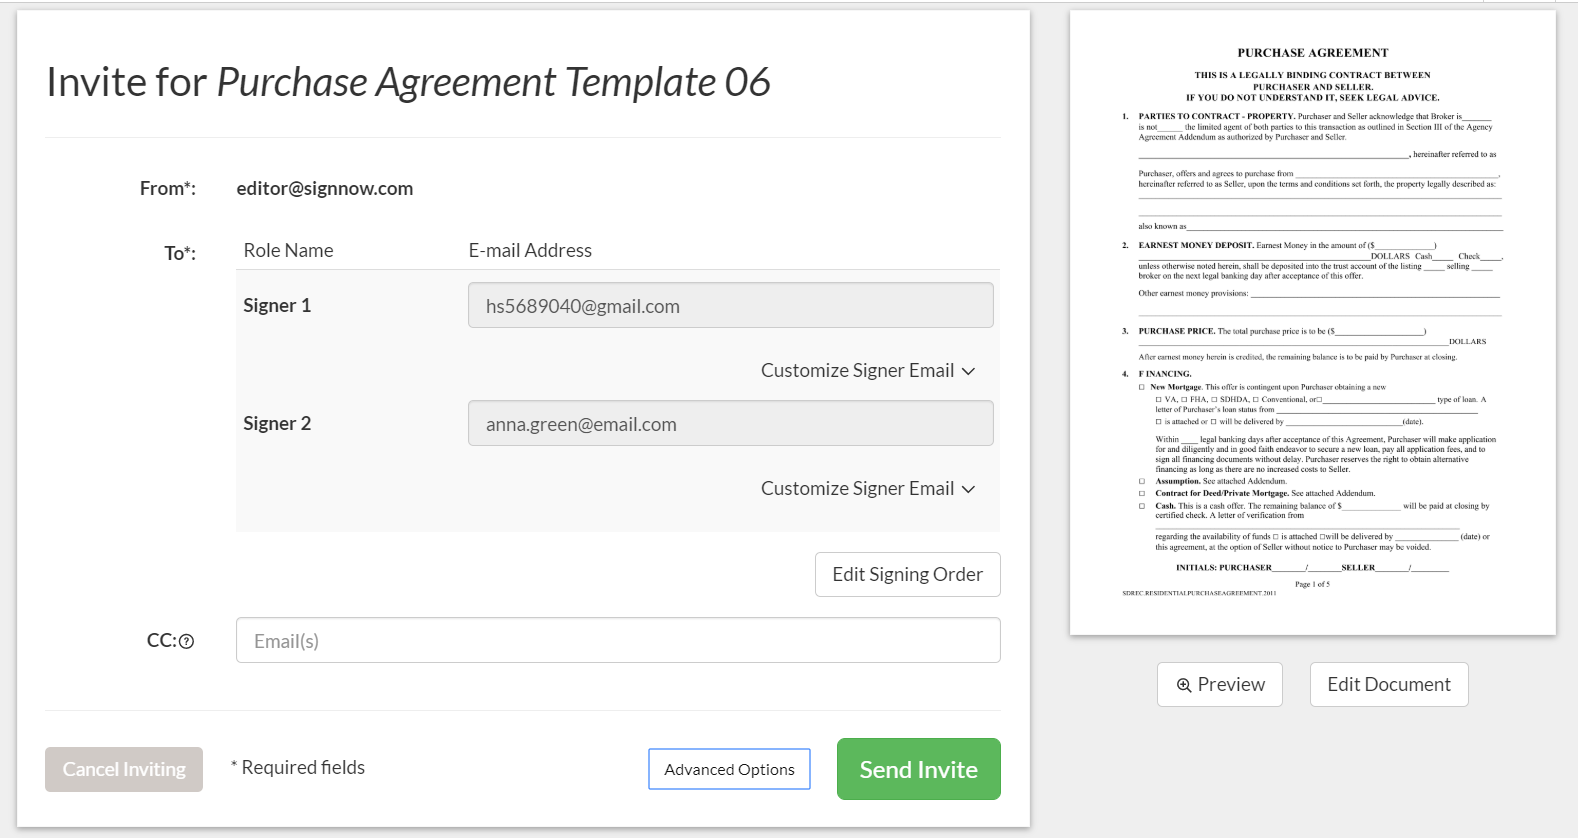
Here, you can also customize a subject and message for each of your recipients.
When everything is ready, click Send Invite.
5.Saving and Exporting Documents
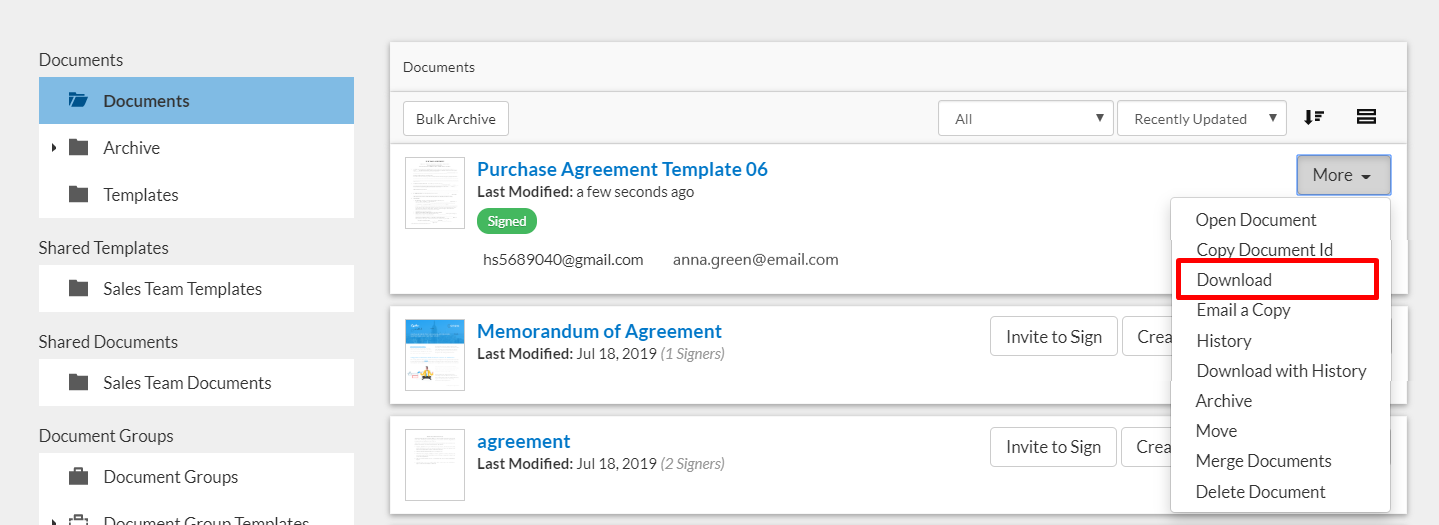
When the document is signed by all signers, it’ll be marked with a green icon. To save it on your device, click More and choose Download. Likewise, you can download any document or template.
You can also synchronize your SignNow account with one of the cloud storages to export signed documents there. Choose the storage you want to sync with and click Connect. For example, let’s choose Google Drive. It’ll ask you to indicate a Google account, and when you do so, it’ll become bound to your SignNow account.

