
Imagine you’re ready to sign a document—no printing, no scanning, just one click, and it’s done. That’s the ease of electronic signatures, letting you close deals in minutes instead of days. And if you’re using Word, adding your signature couldn’t be easier.
Here’s the catch: to keep your document fully secure, you need a dedicated eSignature solution. But more on that later.
In this blog, we’ll show you how to add your signature directly in Word and keep everything protected, fast, and completely digital. Let’s get started.
How to insert your eSignature in a Word document
Adding your eSignature in Word is very convenient. It helps when you’re in a hurry. But you need to know the process to avoid problems. Below, we’ll show you how to insert your electronic signature and why eSignature platforms are more secure, efficient, and legally compliant.
A step-by-step guide on adding a signature and a signature line
Adding signatures and signature lines in Word might seem small, but it’s important. It gives your document a professional look. Following these simple steps, you can add your signature correctly and ensure your document is properly formatted for final approval.
Step 1: Open your document in Microsoft Word
Start by opening the document you want to digitally sign in Word. Ensure the document is ready to be finalized. Adding an electronic signature should be one of the last steps. Word doesn’t have eSignature features like specialized tools. But you can insert a signature image or use the drawing tool.
Step 2: Place your cursor where you want the signature
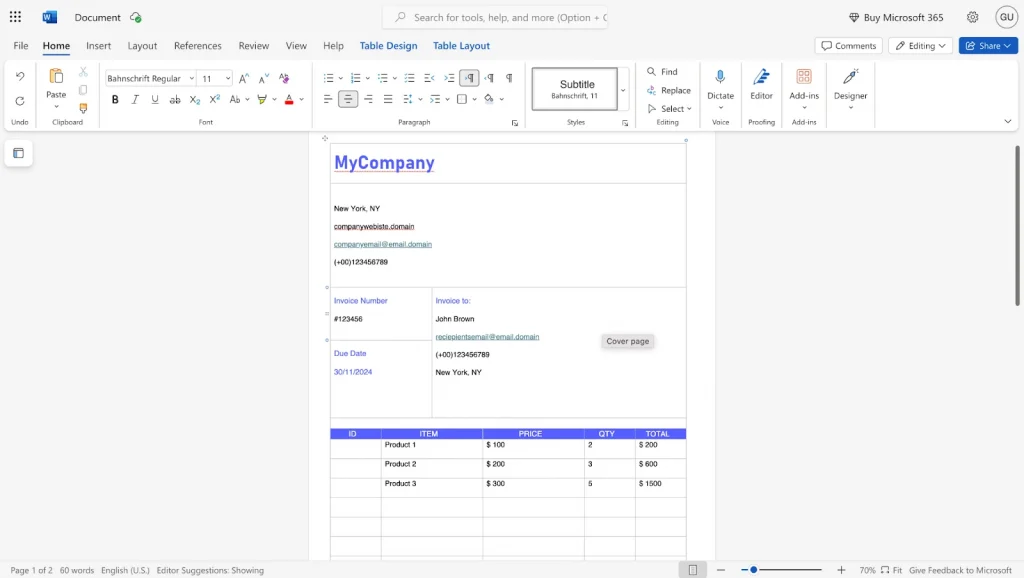
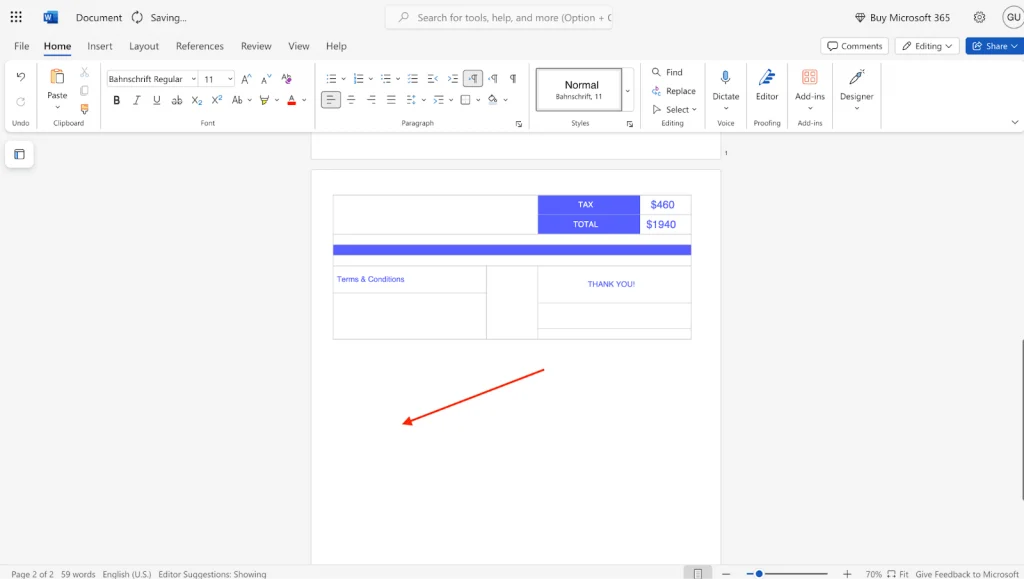
Decide where you want your signature in the document. It could be at the bottom, on a signature line, or anywhere. Position your cursor carefully. Word will place your signature where the cursor is. It’s a small step, but it affects your document’s look. There are three ways to insert an eSignature into your Word document:
- Insert an image of your signature
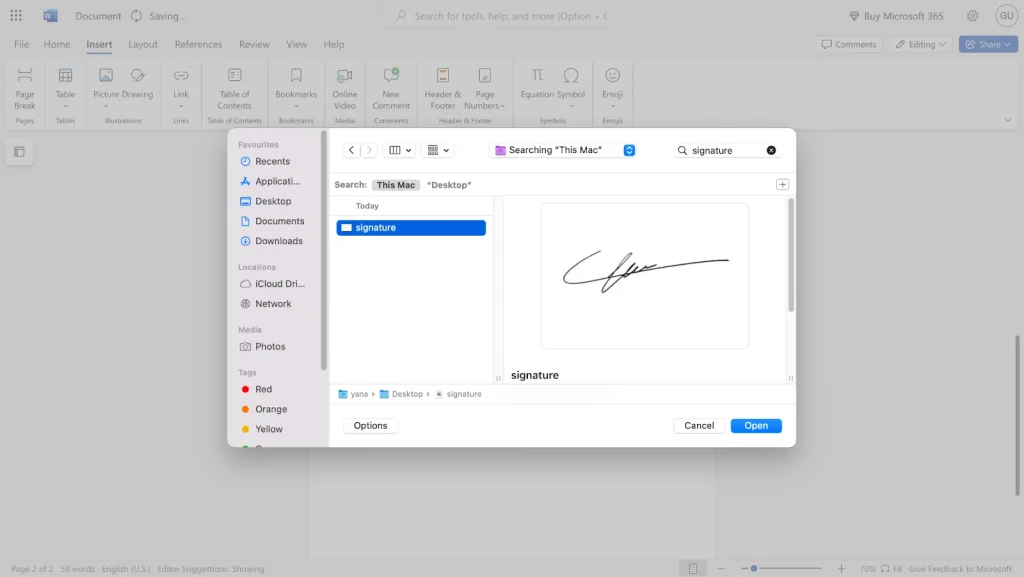
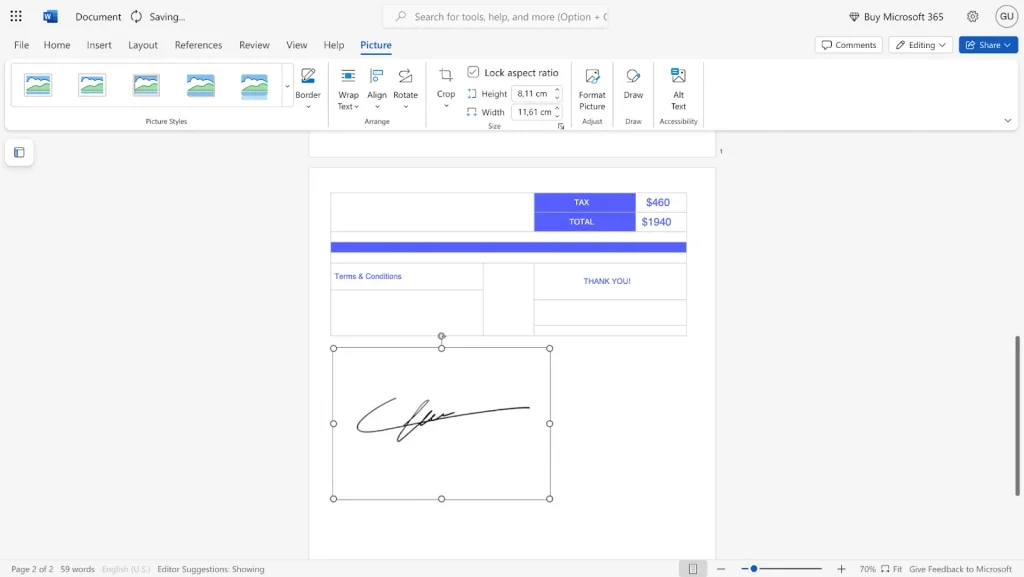
A common way to add a signature is by inserting an image. Write your signature on paper, then scan and save it as a JPEG or PNG file. In Word, click Insert > Pictures, then select the image. Resize and position the image to fit the document. While it’s not a digital signature, it’s an easy visual option.
- Use Word’s drawing feature for a handwritten signature
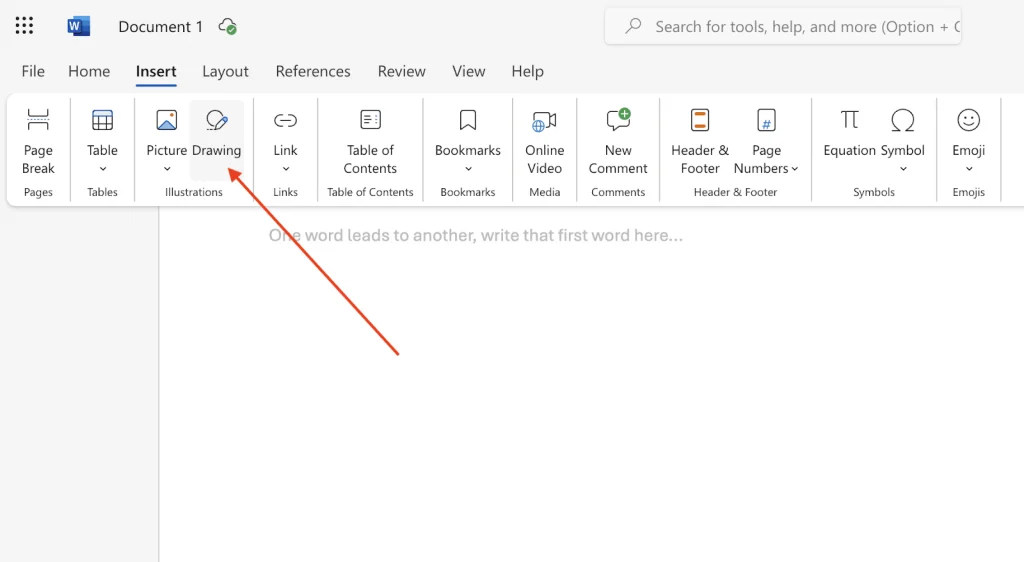
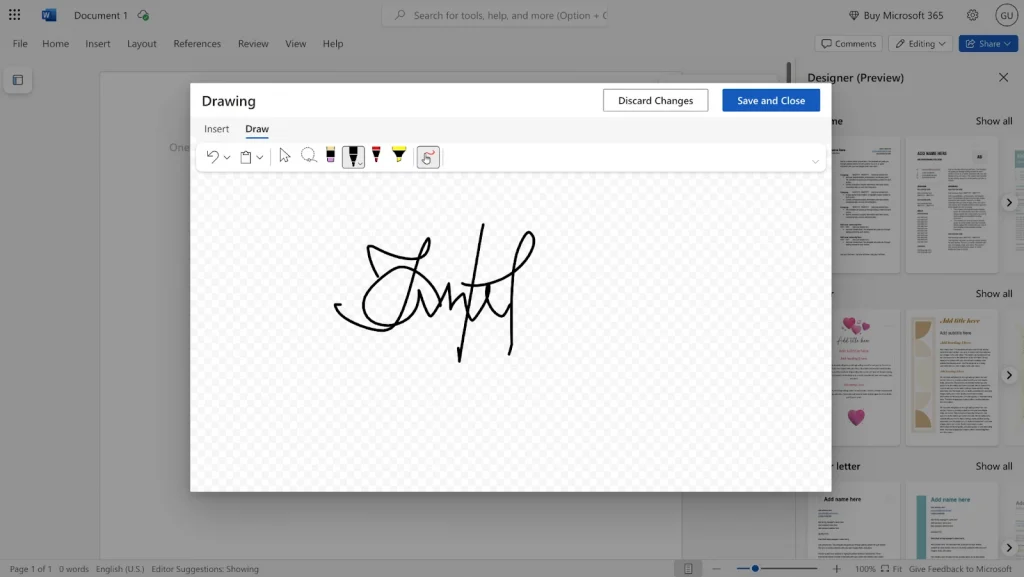
If you’re using a touchscreen device, you have another option: Word’s drawing feature. Go to the Draw tab in the toolbar, select a pen or stylus, and draw your signature directly onto the document. This method adds a personal touch, making it look like you signed it by hand. However, it lacks the advanced security and tracking of eSignature platforms.
If you don’t have a touchscreen device, you can still create a handwritten effect using your mouse or trackpad. Navigate to the Draw tab and choose the drawing tool. With your cursor, carefully sketch your signature directly on the document. While it might take a bit of practice to get it looking just right, this method gives you a unique, personal signature that stands out.
- Add a digital signature line
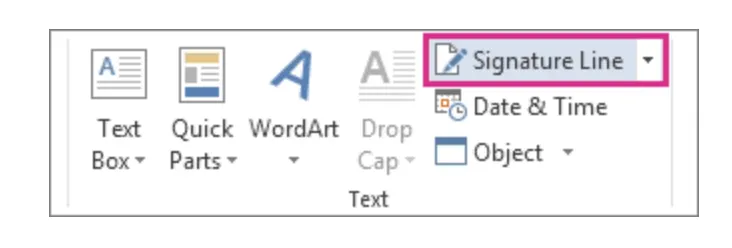
You can add a digital signature line for your document recipient to make it look more professional. Go to Insert > Signature Line to enter your name, title, and email. This feature shows others where to sign digitally. However, unlike eSignature platforms, this method lacks verification and tracking capabilities.
Step 3: Save your document as a PDF for added security
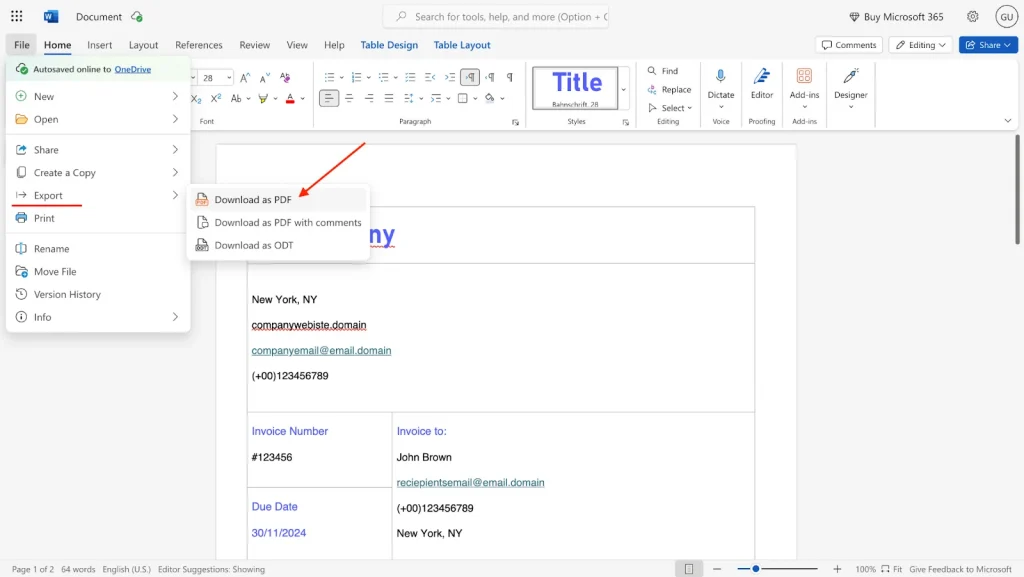
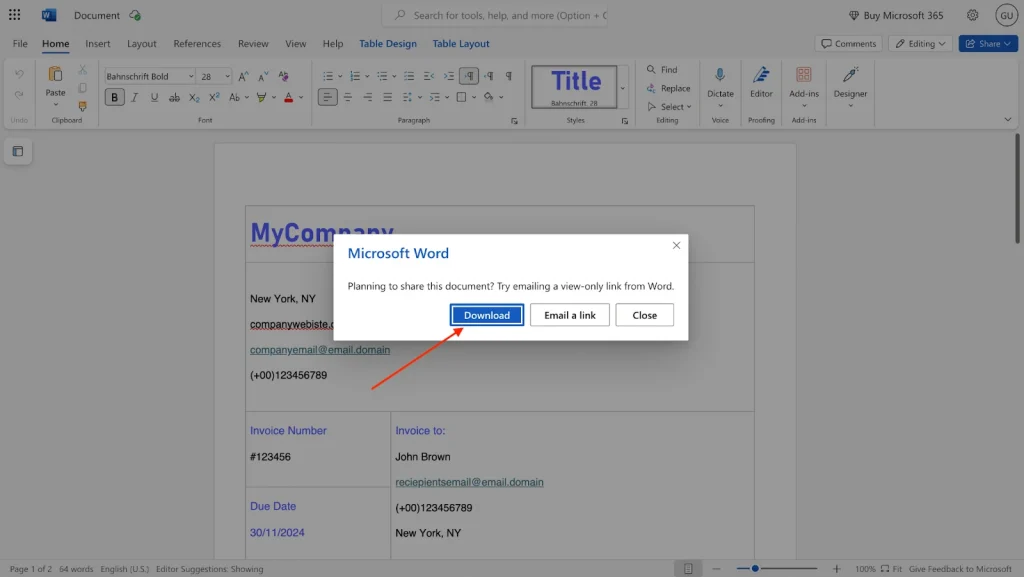
After you’ve added your eSignature, saving your document as a PDF is a good idea. This step protects your document from edits and keeps your signature intact. Go to File > Export, choose Download as PDF, and click Download.
💡Note: Converting your Word document to PDF can add some security, but it’s not as safe as using eSignature software.
Why use a dedicated digital signature platform?
Signing in Word can be quick and easy. However, using an eSignature platform like SignNow offers more security and ensures the validity of your electronic signature. These platforms use advanced encryption to protect your signature and documents and ensure the digitally signed document can’t be changed without detection. This level of security is important for sensitive agreements.
📌Important:
There is a difference between an eSignature and a digital signature.
An eSignature is any electronic document signing method, like typing your name or using a scanned image of your signature. A digital signature is a more secure version. It uses encryption and a digital certificate to verify your identity and protect the document from changes after you sign it.
Benefits of eSignatures and digital signatures: legal compliance, validity, and security
One of the most significant benefits of eSignature tools is legal compliance. They follow regulations like eIDAS in the EU and ESIGN in the US. It ensures that electronic and digital signatures are legally binding and valid in court.
Signatures added directly in Word may not meet these legal standards, which could leave you vulnerable. eSignature platforms offer secure storage and use encryption to protect sensitive information. For businesses handling sensitive or high-value agreements, this compliance adds value. It also builds trust so all parties can confidently sign and share documents.
Enhanced features: real-time tracking, multiple signers, and notifications
Another benefit of using an eSignature platform is its extra features. These include real-time tracking and notifications. These tools let you know when a document is opened, viewed, or digitally signed, providing full transparency throughout the signing process. Also, most platforms allow multiple signers and custom signing orders. This is useful for complex agreements that need input from different parties.
Now, did the procedure of adding a signature directly to the Word doc look simple? It may not be rocket science, but it can definitely be optimized and simplified. For example, SignNow allows you to add a secure and legally binding signature to your Word documents with just one click. Besides, a comprehensive online editor and extra features can make the entire document look professional.
How to use SignNow to add your eSignature to Word documents
There are two ways how to add an electronic signature to your Word documents using the SignNow eSignature solution:
- Signing the document directly from the Internet search list
- Adding your signature to a document you upload to SignNow
Adding a SignNow signature to a Word document from the search list
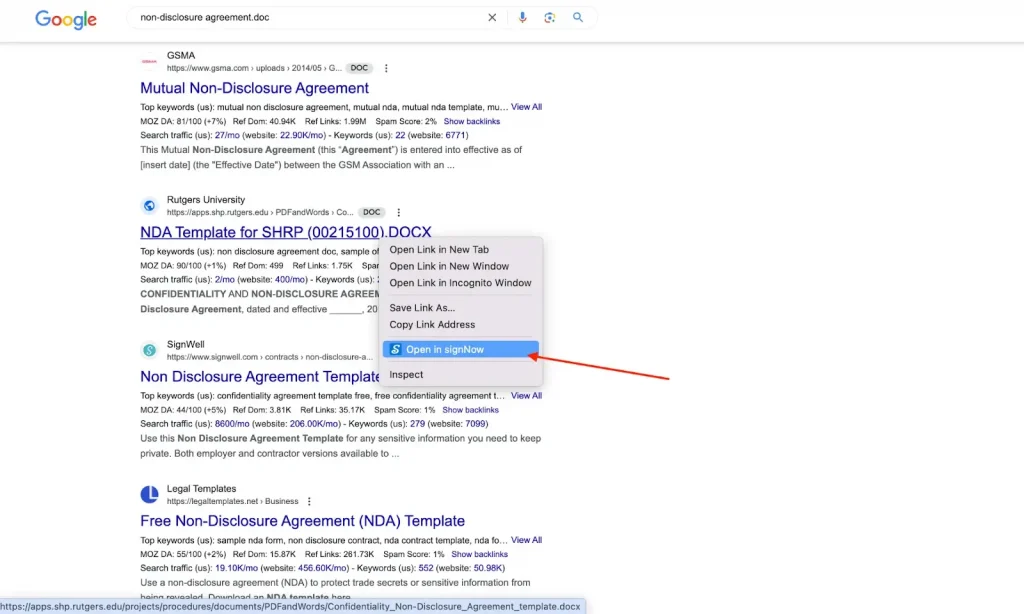
Say you’ve googled a document that meets your business needs and want to sign it immediately.
1. Open the dropdown menu next to this document and select Open in SignNow.
2. Make any changes you need in the SignNow online editor.
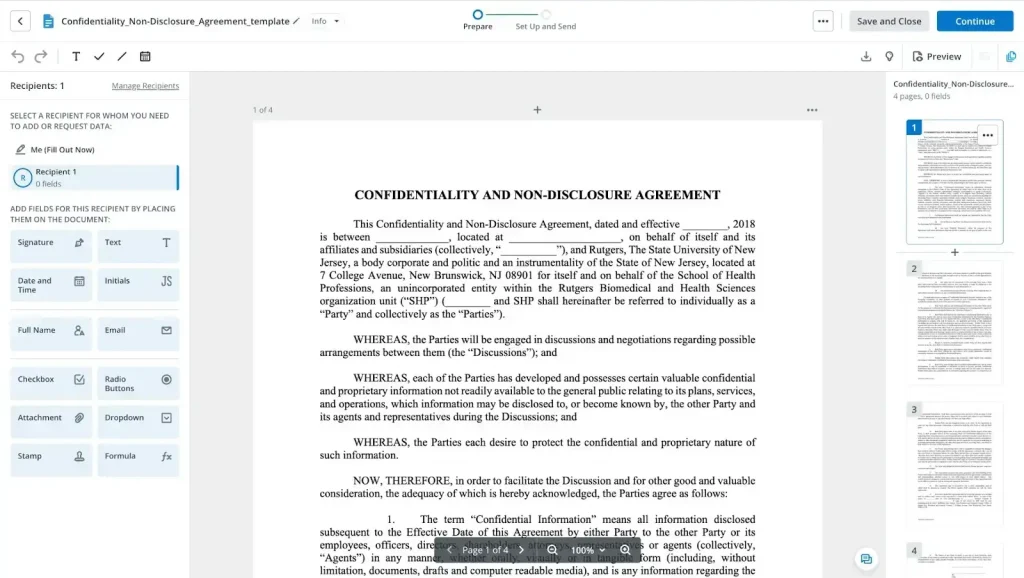
3. Add your signature (a) or insert a field to request a signature from your document recipient (b).
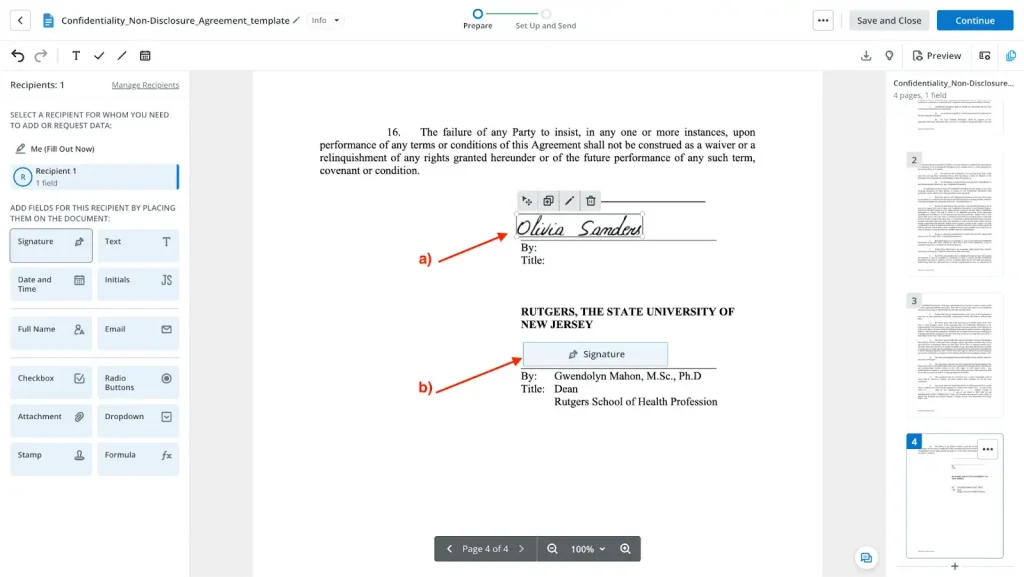
💡 Note: Your document recipient doesn’t need to have a SignNow account to sign your document!
Adding an eSignature to a Word document in your SignNow account
If you already have a SignNow account, the procedure is as simple as that:
1. Click the +Create button, select the Document option, and click Upload. SignNow supports .pdf, .doc, .docx, and other popular document formats.
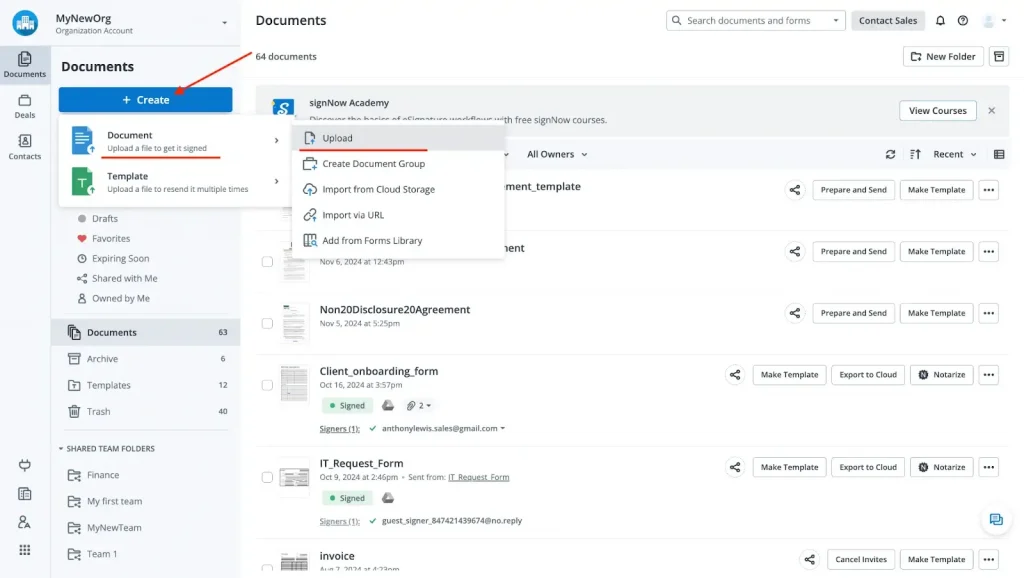
2. You can make any changes to the uploaded document and add your signature. If necessary, you can also insert a field for the document recipient’s signature.
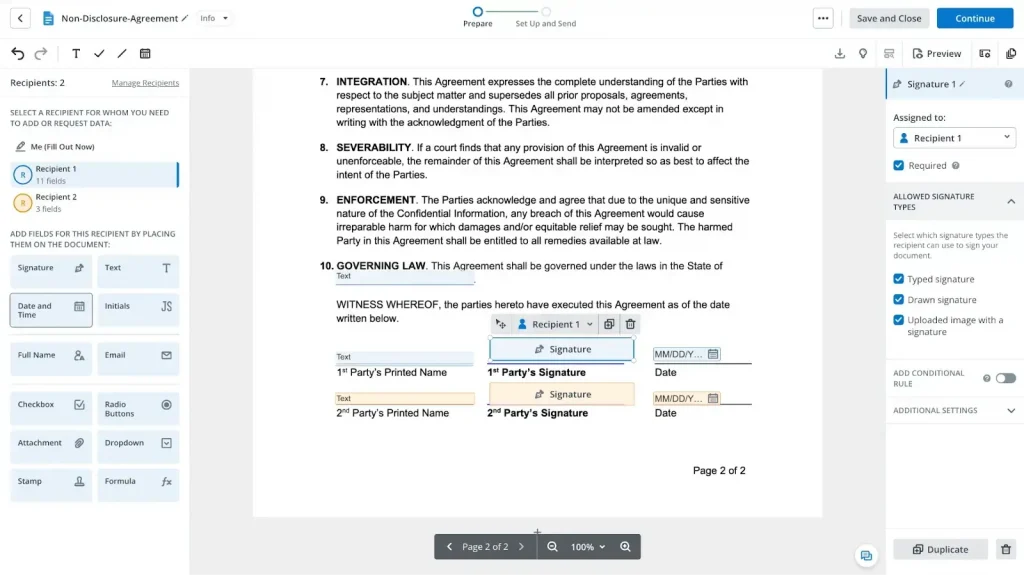
Why choose the SignNow eSignature?
Using SignNow eSignature is more beneficial than using Word’s tools to sign documents. It’s easier, safer, and more flexible. While Word lets you add an image of your signature, SignNow offers a secure, legally binding eSignature without extra hassle. Plus, you can track documents, add multiple signers, and set reminders—all things Word can’t do. For a faster, more reliable signing experience, SignNow is the better choice. Sign up for a free trial.
Conclusion
Adding your signature to a Word document can be quick and easy. Word’s built-in tools can get the job done, but using a platform like SignNow makes it even easier and more secure. Plus, you get extra perks like tracking and reminders. Now that you know the basics, you’re ready to sign documents digitally in a way that’s fast, safe, and hassle-free. Give it a try, and see how simple signing can be!
FAQ
How do I write my signature on a Microsoft Word document?
To write your signature in Word, you can use the drawing tool. Go to the Draw tab and select a pen. Then, draw your signature directly on the document.
How do I add a handwritten signature to a document?
You can add a handwritten signature by scanning it and saving it as an image. In your document, go to the Insert tab and choose Pictures. Select the image file and adjust it to fit.
How do I create an electronic signature?
An electronic signature can be created using a drawing tool or by uploading an image. You can draw your signature with a stylus or mouse in a document. Alternatively, scan your handwritten signature and insert it as an image.
How do I insert a signature in Docs?
In Google Docs, go to the Insert tab and choose Drawing. Select New and use the drawing tools to create your signature. Then, click Save and Close to insert it into your document.
How do I create a digital signature?
To create a digital signature, you need a special eSignature tool. These tools let you sign documents securely using encryption. You can sign a document by typing, drawing, or uploading a scanned version of your signature.

