
signNow’s signature fields allow for faster document approval collection from signers while significantly decreasing the chance of human error. Using predefined signature fields helps improve document accuracy. Every signer places their electronic signature in the designated field specifically assigned to them.
As a result, using signature fields creates a more seamless customer experience — signers don’t postpone the signing of a document, as they can instantly do so from anywhere, at any time.
If you want to send a signature request via the API to a single or multiple signers, you need to add signature fields to your document. If you’re new to the concept of the signNow API, make sure to check out the articles below to get a better understanding of how it works:
- The ultimate guide to the signNow API
- The signNow API Dashboard
- Signature request with the signNow API
Take note: Prior to adding fields, you need to upload a document to your signNow account.
Adding signature fields to a document
To begin adding fields to an existing document, copy the document ID and open a new tab. Switch to PUT and paste your document ID into the endpoint field as follows.
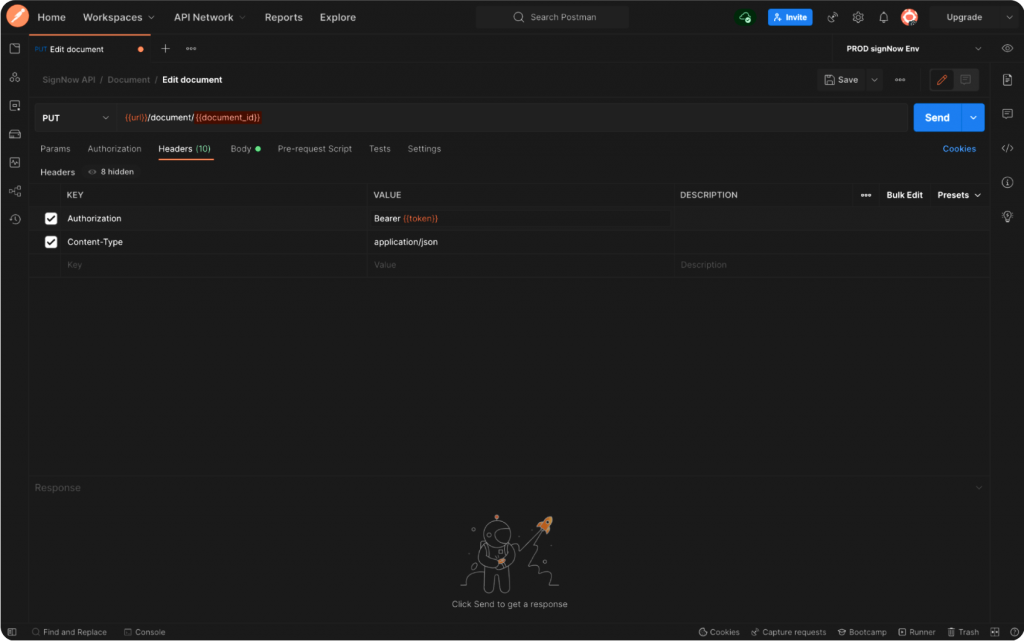
Now let’s set up the Authorization header. The Value, again, should contain Bearer followed by the bearer token that we generated earlier.
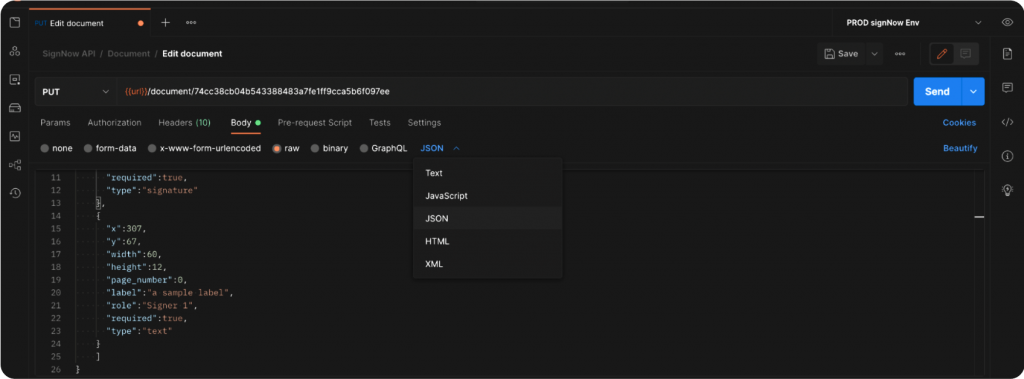
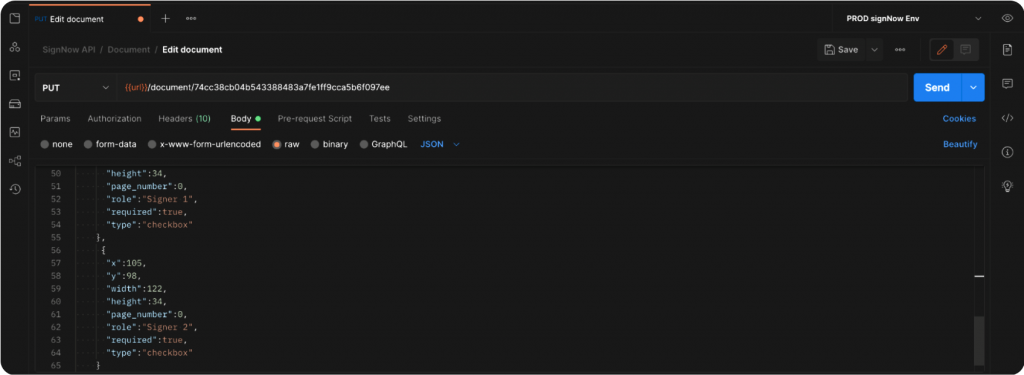
Finally, in the body of the request, switch to raw JSON and specify how and where you want your fields to be added.
For instance, we want to add three types of fields to our document — text, checkbox, and signature — and assign them to Signer 1 and Signer 2.
Adding text, signature, and checkbox fields
Use the code snippet below to set up text, signature, checkbox fields, and signing roles:
|
1 2 3 4 5 6 7 8 9 10 11 12 13 14 15 16 17 18 19 20 21 22 23 24 25 26 27 28 29 30 31 32 33 34 35 36 37 38 39 40 41 42 43 44 45 46 47 48 49 50 51 52 53 54 55 56 57 58 59 60 61 62 63 64 65 66 67 68 69 70 |
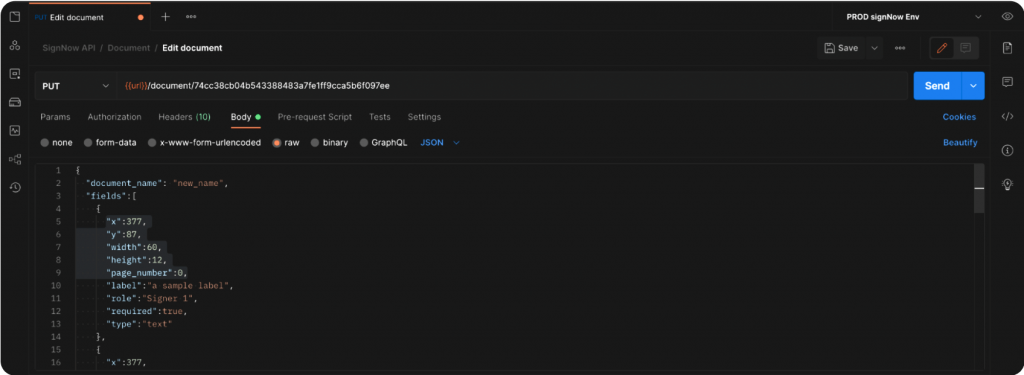
curl --location --request PUT 'https://api.signnow.com/document/{{docID}} \ --header 'Authorization: Bearer {{token}}\ --header 'Content-Type: application/json' \ --data-raw '{ "document_name": "new_name", "fields":[ { "x":377, "y":87, "width":60, "height":12, "page_number":0, "label":"a sample label", "role":"Signer 1", "required":true, "type":"text" }, { "x":377, "y":67, "width":60, "height":12, "page_number":0, "label":"a sample label 2", "role":"Signer 2", "required":true, "type":"text" }, { "x":355, "y":108, "width":122, "height":34, "page_number":0, "role":"Signer 1", "required":true, "type":"signature" }, { "x":355, "y":158, "width":122, "height":34, "page_number":0, "role":"Signer 2", "required":true, "type":"signature" }, { "x":105, "y":28, "width":122, "height":34, "page_number":0, "role":"Signer 1", "required":true, "type":"checkbox" }, { "x":105, "y":98, "width":122, "height":34, "page_number":0, "role":"Signer 2", "required":true, "type":"checkbox" } ] }' |
Let’s start with adding the text fields:
1. Specify each field’s position on the page along with the width and height parameters. Remember that page numbering always starts with a “0” when setting the page number parameter.
2. Set the label value for each field and specify whether it’s required or not. Finally, assign the field to one of the signers by setting the role parameter.
You can also add the name and prefilled text parameters, if necessary:
- “name” – unique field name
- “prefilled_text” – editable text that appears in the field when the signer opens the document, e.g. Lucy
Once the objects of text fields have been added, we’re going to add two checkbox fields and two signature fields and assign them to our signers using the same technique.
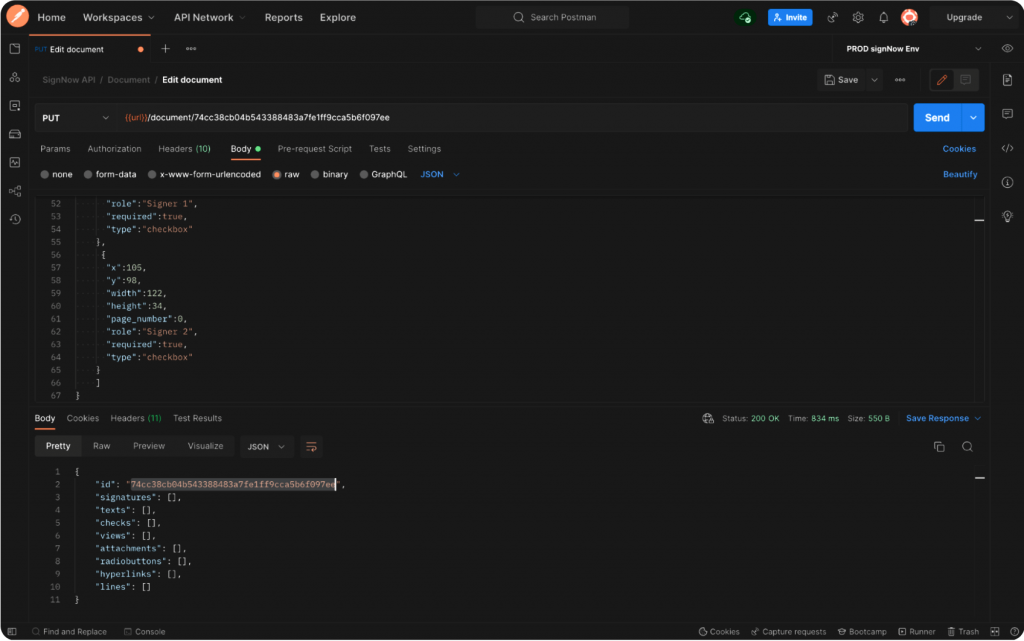
3. Send the PUT call when finished.
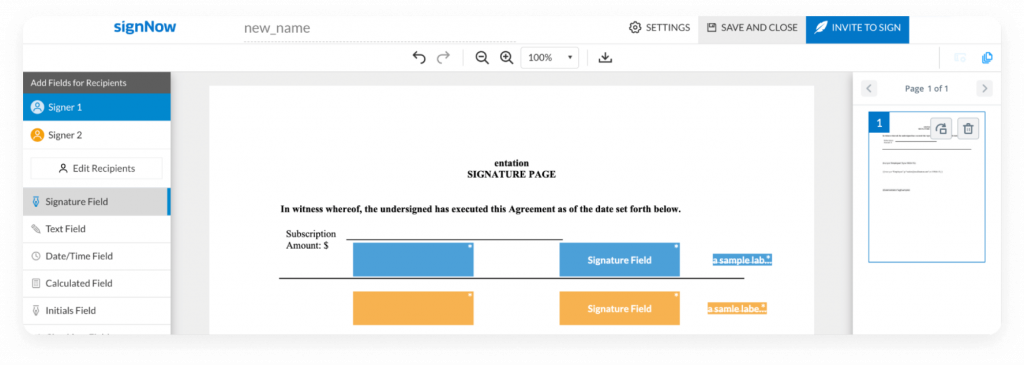
Go back to our document and make sure the fields have been added and everything is in the right place.
Watch the step-by-step video instructions in the video below:
Other field types
Remember that you can add other types of fields and assign them to signers:
- Initials field – a type of field which can hold a signature (be signed). It differs from a signature field because it’s not legally binding. To add their initials, signers use the same instruments in the signNow editor that they do to place a signature – draw, type, or upload.
- Dropdown field (enumeration) – a type of field with a number of preset options to fill in. Signers can either select one of the options available or type in a different option.
- Attachment field – a type of field that contains an attached file.
- Hyperlink field – a type of field which contains a URL.
- Radio button field – a type of field where users may only make one selection out of a group of items.
For more information on the signNow API, its features, and references, please view our detailed documentation.
